Single Filters
Applying a filter individually or through the Define Filters window does not result in different outcomes - the only difference is the method of accessing the filter configuration.
There are two types of filters for simulation results, and two methods for filtering results; the options available for a filter are the same whether the filter is defined on a single item or through the Define Filters window. The settings are:
- Filter Type - Enable or disable the filter, as well as configure it as a Standard or Iteration filter.
-
- Disabled - The filter will not be applied.
-
Disabling a filter does not remove that filter's configuration! If a filter is disabled and then re-enabled, its original configuration will be preserved. To remove a filter entirely, use the Clear Filter command from the Settings/Actions command button (see below).
- Standard - Apply a Standard filter to the selected element. Standard filters will filter all simulation results for the selected input or output only.
- Iteration - Apply an Iteration filter to the entire simulation data set. Iteration filters will remove an entire iteration - meaning the iteration results for ALL inputs and outputs - from the simulation data set based on the filter defined for the single element.
-
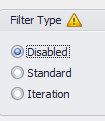
Figure 1 - Filter Warning
When an iteration filter has been applied to an element and that filter has an effect on the simulation results of other elements (inputs or outputs), the Filter Type section will include a warning icon (Figure 1, right). This icon only denotes that a different filter is currently limiting the results available for the selected element.
- Filter Bounds - Define the percentile or value bounds of the filter; values that fall between the Minimum and Maximum values set will be kept, all others will be filtered.
Configuring a Filter
There are several ways to access a filter definition for a single element:

Figure 2 - Filter Shortcut Button
- Use the Define Filter button (
 ) in any Browse Results window's command buttons. The filter will be created for the element being viewed.
 - Use the Define Filter button ( ) from the Results Summary window's command buttons. The filter will be created for the selected element (or the first selected element if multiple rows are selected).
- Use the filter shortcut button (Figure 2, right) in the upper right of the column headers of any of the Simulation Detail windows (e.g. Simulation Data, Simulation Sensitivities, etc.).
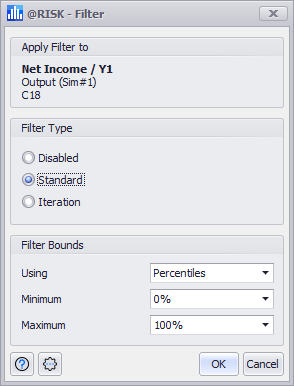
Figure 3 - Filter Window
Defining a filter for a single element will open the Filter window (Figure 3, right). The Filter window includes information about the element being filtered, including its name (as determined by @RISK, either by the RiskName property function or through Automaic Names), its type, its simulation number, and the Excel cell reference. The window also includes sections for configuring the filter type and bounds; see above for more information.
Filter Window Command Buttons
The Filter window includes the following command buttons: