Getting Around @RISK
The @RISK Ribbon
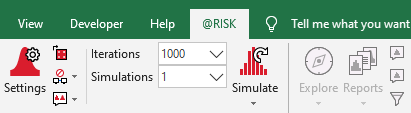
Figure 1 - @RISK Tab
When the @RISK add-in is loaded in Excel, the @RISK ribbon will be added to the tabs at the top of the application window (Figure 1, right). The @RISK ribbon gives access to all @RISK functionality, and is organized into sections, from left to right, following the overall process of building a model - Define, Simulate, Analyze.
The @RISK ribbon consists of the following sections:
The @RISK Command Buttons
At the bottom of most @RISK windows are the Command Buttons; the Command Buttons can include menus and options related to the current window. Please note: not every window contains all of the buttons detailed below. For example, the Define Time Series window (Figure 1, below) has the Help, Settings, and Animate Sample Path buttons to the left and the Export button to the right; whereas the Define Distribution window (Figure 2, below) has the Help, Overlays, Settings/Actions, and Distribution Display Format buttons to the left, and the Export button to the right.

Figure 2 - Define Time Series Window

Figure 3 - Define Distribution Window
Buttons that are specific to only one window are detailed in the sections for those functions. The buttons that are common across nearly every window are described below.
 Help Button
The Help Button will open help resources based on the current Preferences set for @RISK - either the online help, located at help.palisade.com, or a local copy of the help using the Microsoft Help Viewer. Wherever possible, the Help button uses context-sensitive help and will open either version (online or local) to the page most closely related to the window or dialog box in which the button was clicked.
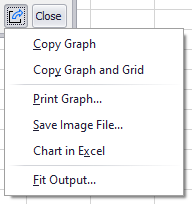
Figure 4 - Export Menu
 Settings/Actions Button
The exact options available under the Settings/Actions button will change between @RISK windows. See the documentation on the specific window for more information about the Settings/Actions button and which options it contains.
 Export Button
Many windows in @RISK contain the Export button, which includes options fro sending the contents of the window somewhere else - to Excel, to a printer, to the clipboard, etc. The exact contents of the Export menu depends on the specific window in question.
Windows that Display Graphs
Windows that display graphs have a standard set of exporting options. See Exporting Graphs for more information.
Windows that Display Tables
Windows that display tables generally have some or all of the following options: