Optimization Constraints
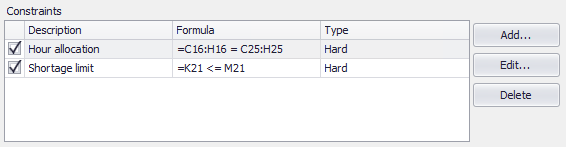
Figure 1 - Adjustable Cell Range Constraints
The Constraints table contains additional conditions that must be satisfied for a solution to be valid. Each constraint in the model is shown in its own row of the table. Constraints are configured in the Constraints Settings window. See below for more information.
To add a constraint, click the Add button to the right of the Constraint table.
To edit an existing constraint, highlight it by either selecting its checkbox in the Constraint table, or by clicking within its row, then click the Edit button.
To delete an existing constraint, highlight it by either selecting its checkbox in the Constraint table, or by clicking within its row, then click the Delete button.
For each constraint in the model, the following information is displayed:
Configuring Constraints
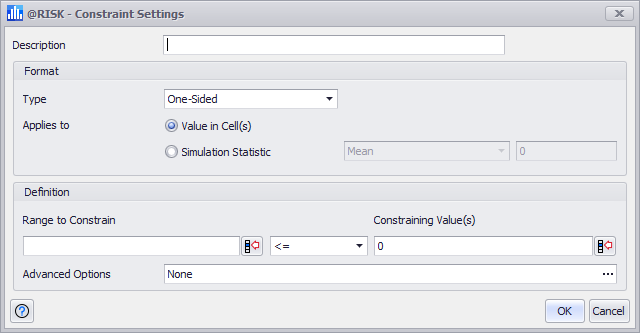
Figure 2 - Constraint Settings - One Sided Entry
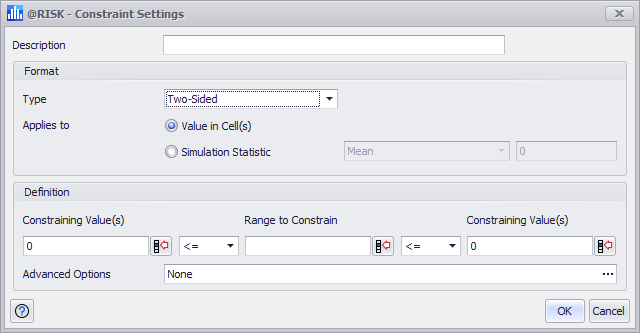
Figure 3 - Constraint Settings - Two Sided Entry
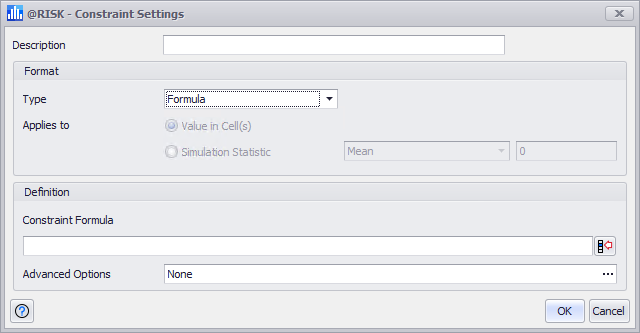
Figure 4 - Constraint Settings - Formula Entry
The Constraints Setting dialog (Figures 2, 3, and 4, right) contains options for specifying conditions that must be met for an optimization trial solution to be considered valid.
The Type option controls the overall format of this dialog. The One-Sided (Figure 2, right) and Two-Sided (Figure 3, right) entry styles are very similar, while the Formula (Figure 4, right) entry style is quite different.
One-Sided and Two-Sided Constraint Entry
In these styles, constraints are entered by specifying one more cells to constrain, the values they should be constrained by, and various options that specify how and when the constraints are evaluated.
Constraint configurations include the following settings:
- Description – Text that can be used to make the constraint more readable.
- Format - Options for setting the type of constraint.
- Definition - Configurations for the constraint. The options for this panel will change based on the value for Type selected in the Format panel.
-
- Range to Constrain – Specifies the cell or cells that must meet a condition.
- Constraining Value(s) – Specifies the value or values to which the Range to Constrain field must be restricted. A number, a cell, or a range of cells can be entered; a range with multiple cells will specify a different bound for each cell in the Range to Constrain. In the two-sided format, there can be both an upper and lower bound specified. In the one-sided format, only one bound will be available.
- Advanced Options - Displays any additional options for the constraint. Use the More button (
 ) to open the Constraint Advanced Options window; see below for more information.
 -
Please note: if no Advanced Options are set for a constraint, the constraint will default to a Hard constraint with Precision and Evaluation Time set to 'Automatic'.
Formula Constraint Entry
In the Formula entry style of a constraint, any Excel formula can be specified as a constraint.
For example, the formula
=IF(A1>100, B1>0, B1<0)
is a constraint that requires the value in cell B1 to be positive or negative depending on the value in cell A1. Alternatively, the formula can be entered in a cell; if that cell is C1, for example, then you can enter =C1 in the Formula field of the Constraint Settings dialog.
In general, entering constraints in the One-Sided or Two-Sided style helps RISKOptimizer find the optimal solution faster. Only use the Formula entry method in cases where it is not possible to use the other entry styles. The formula discussed above could be entered in cell D1 as:
=IF(A1>100, B1, -B1)
Then a simple One-Sided constraint can be added, requiring that D1>0.
Constraint Advanced Options
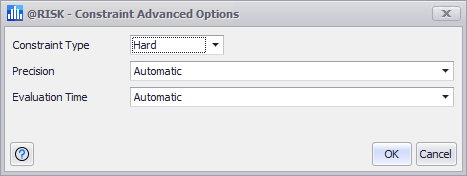
Figure 5 - Constraint Advanced Options
Clicking the 'More' button in the Advanced Options field opens the Constraint Advanced Options window. This window includes the following options:
Constraints for Efficient Frontier Analysis
To perform an Efficient Frontier Analysis, it is necessary to specify a special type of constraint with multiple alternative “constraining values.” To do this, first configure the model to be an efficient frontier model; see Efficient Frontier Analysis for more information.
Please note: the Efficient Frontier option for the Type pulldown will not be available until the model has been configured to use an Efficient Frontier analysis.
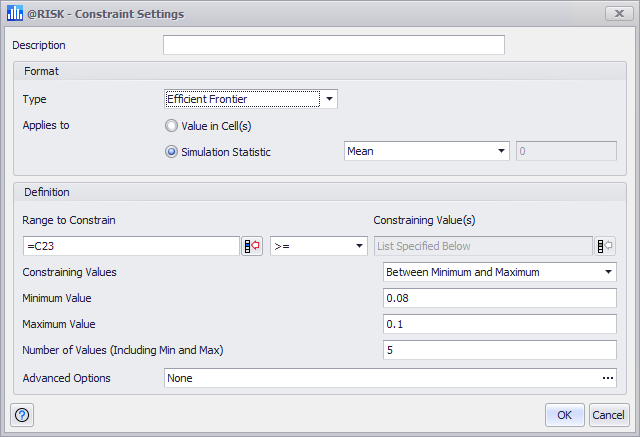
Figure 6 - Efficient Frontier Constraint
Once a model has been appropriately configured and the constraint set to the Efficient Frontier type, extra options appear in the Definition panel (Figure 6, right).
- Range to Constrain – Specifies the cell or cells that must meet a condition.
- Constraining Values - Specifies how the list of values will be entered.
-
- Between Minimum and Maximum - The list of values is defined by setting minimum and maximum values for the list, and then setting the total number of values for the list. For example, suppose the desired list contains the following list of constraining values: 0.08, 0.085, 0.09, 0.095, 0.10. This can be specified using a min-max range containing 5 values between 0.08 and 0.10.
- Table - The list of values is defined as an explicit list entered in the Table Values window. Click the More button ( ) to open this window and enter values.
- In Excel Range - The list of values is included in the model within a range of cells. Use the Select Cells button (
 ) to select the range.
- Advanced Options - Displays any additional options for the constraint. Use the More button ( ) to open the Constraint Advanced Options window; see below for more information.
-
Please note: if no Advanced Options are set for a constraint, the constraint will default to a Hard constraint with Precision and Evaluation Time set to 'Automatic'.