Constraints
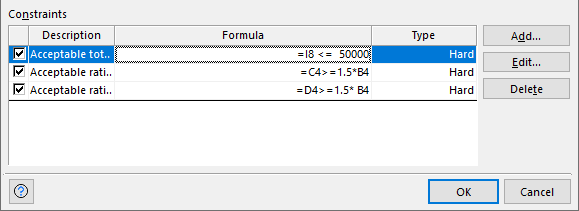
Figure 1 - Constraints Panel
Evolver models can include constraints, or conditions that must be satisfied for a solution to be valid. Constraints are shown in the Constraints table (Figure 1, right) at the bottom of the Model Definition dialog.
The Constraints table consists of four columns:

Figure 2 - Constraint Settings Window
To add a constraint, click the Add button. This will open the Constraint Settings window (Figure 2, right), where the constraint can be configured. See Configuring a Constraint, below, for more information.
To edit an existing constraint, select the constraint by clicking inside its row (not the check box to the left) and click the Edit button.
To delete an existing constraint, select the constraint by clicking inside its row (not the check box to the left) and click the Delete button.
Configuring a Constraint
There are three constraint Entry Styles:
- One-Sided - The acceptable adjustable cell values must exist above or below the Constraining Value(s).
- Two-Sided - The acceptable adjustable cell values must exist between the Constraining Value(s).
- Formula - The acceptable adjustable cell values must exist within a set of values as determined by a formula.
To select the type of constraint, use the Entry Style button at the bottom of the Constraint Settings window (Figure 2, above). See Constraint Entry Style for more information.
The most basic constraint is a One-Sided Constraint, shown in Figure 2, above; the entries for this constraint are:

Figure 3 - Constraints Panel
For more detailed configurations, click the More button. This will expand the window to show all options (Figure 3, right). The following fields are available: